
登陆

77 浏览PVE安装 bleachwrt固件作为旁路由教程
一、下载地址:https://github.com/bleach1991/lede,在旁边的realse处单击,找到新版本的X64版本,下载好之后解压得到img镜像文件(img下载有两个版个,一个是BISO引导对应在PVE中选择biso为seabios,一个为EFI版本,对应选择的引导类型为也为seabios,只是驱动为较新,建议选择efi版本安装WRT),在PVE主机上 local(因为已经合并了local-lvm),上传ISO镜像文件,记住这个上传的ISO镜像文件地址:
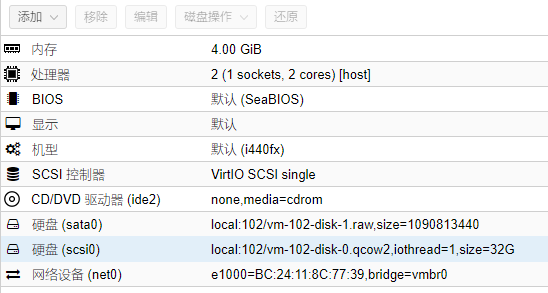
新建虚拟机,选机型为i440fx,假如下载的是BISO版本的直接选默认seabios即可,先添加一个硬盘,之后要删除的,核心数按需要,一般为2核,CPU类型为HOST,旁路由只需添加一块网卡选择intel E1000,防火墙关闭。
到PVE shell中执行:
qm importdisk 102 /var/lib/vz/template/iso/bleachwrt.img local #102为虚拟机ID号,bleachwrt.img为上传的镜像文件。
到刚新建的虚拟机中,硬盘,添加未使用的硬盘,找到刚刚生成的一硬盘,添加为sata 0接口硬盘,选项,引导顺序处选择sata 0引导即可。
引导之后默认网卡地址为192.168.1.1 ,将电脑的地址设置为一个192.168.1.X地址,进入浏览器输入IP地址192.168.1.1,用户名root,密码:password,进入wrt网页配置。
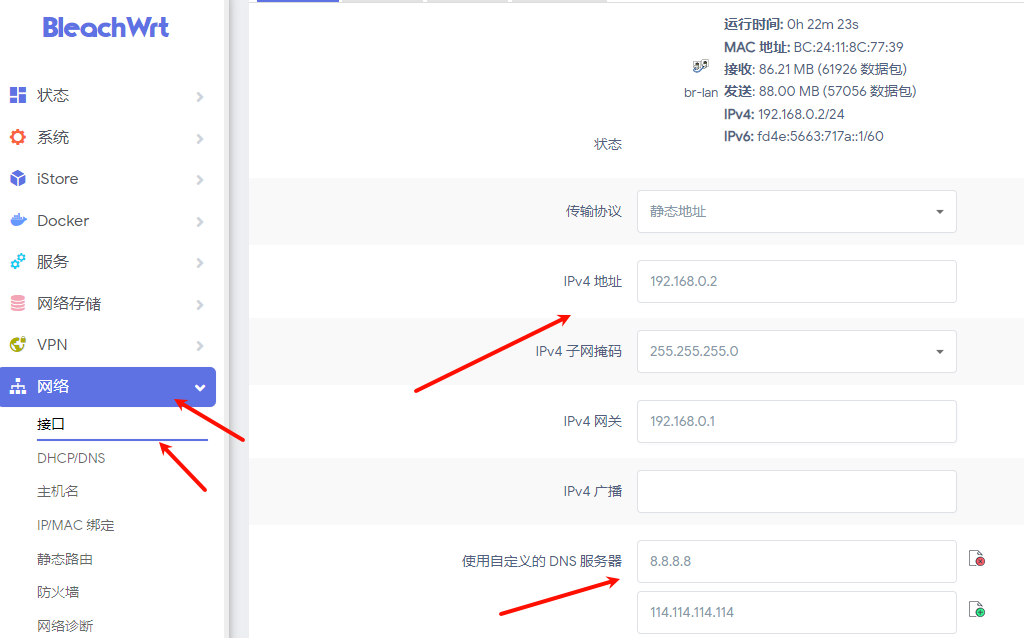
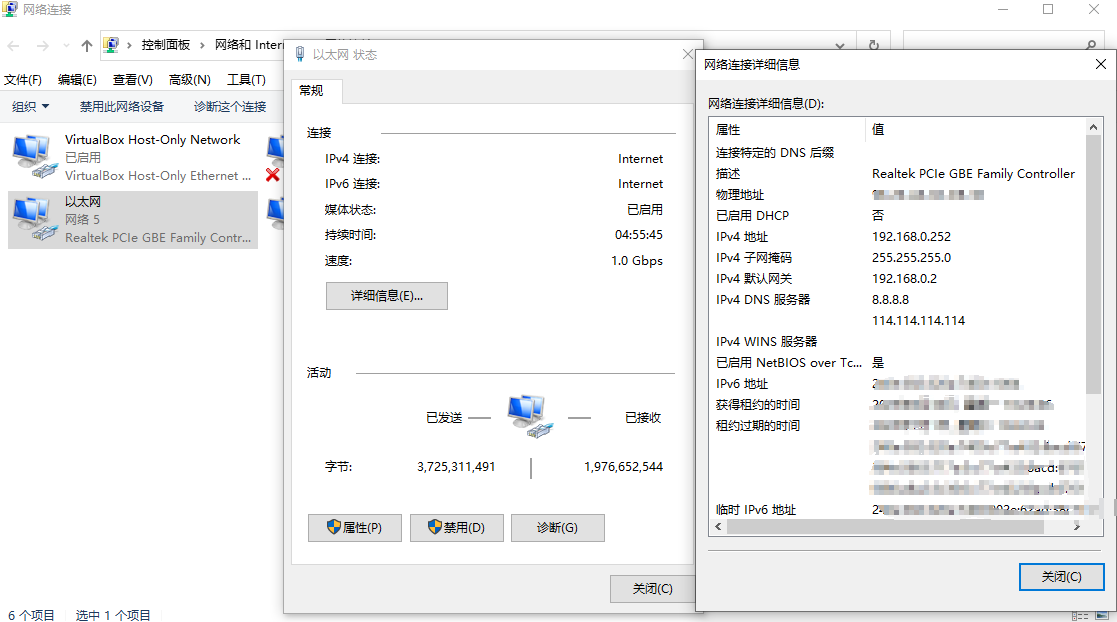
在网络,接口处配置你所需要的IP地址,如WRT旁路由设置为192.168.0.2 ,之后管理地址就改为这个新的IP地址,网关改为主路中的IP地址:192.168.0.1,子网掩码:255.255.255.0,DNS改为公共DNS:8.8.8.8 114.114.114.114。修改之后再把电脑IP地址为改192.168.0.X段IP地址,就可以用新修改的192.168.0.2地址进入WRT设置界面。
修改WRT的root密码
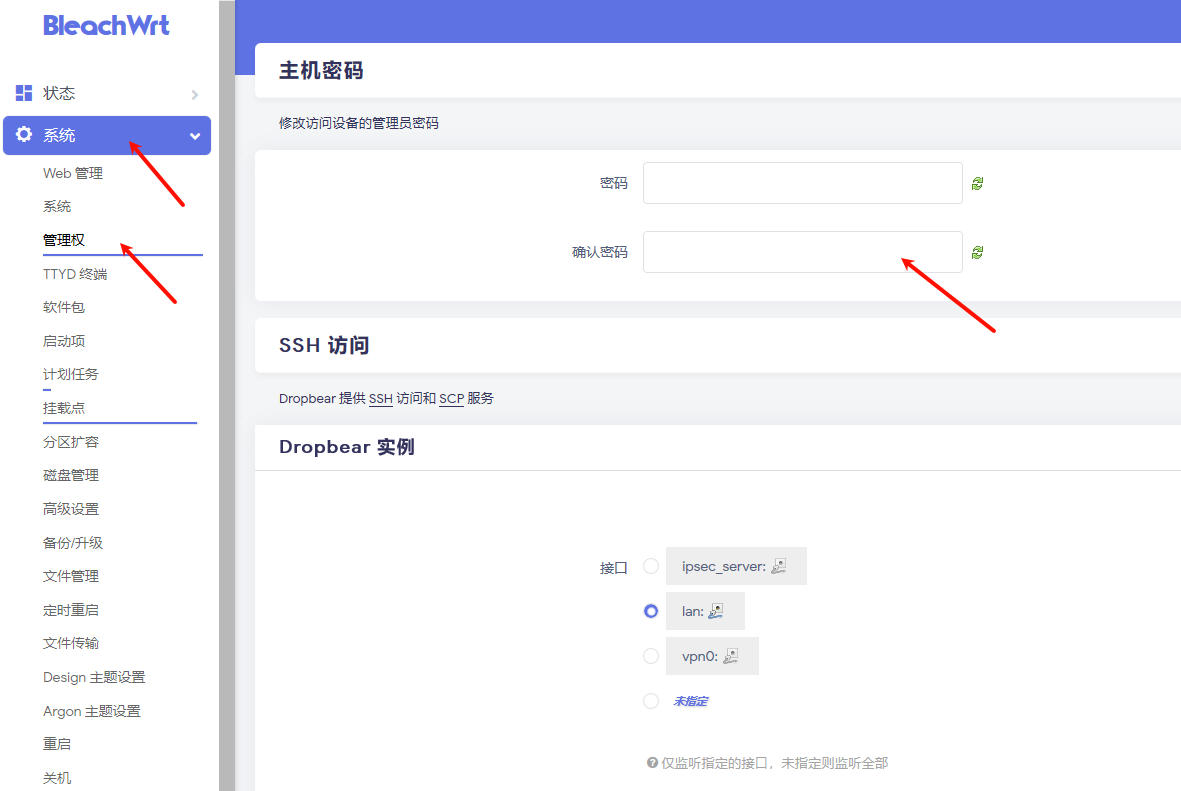
修改管理口地址
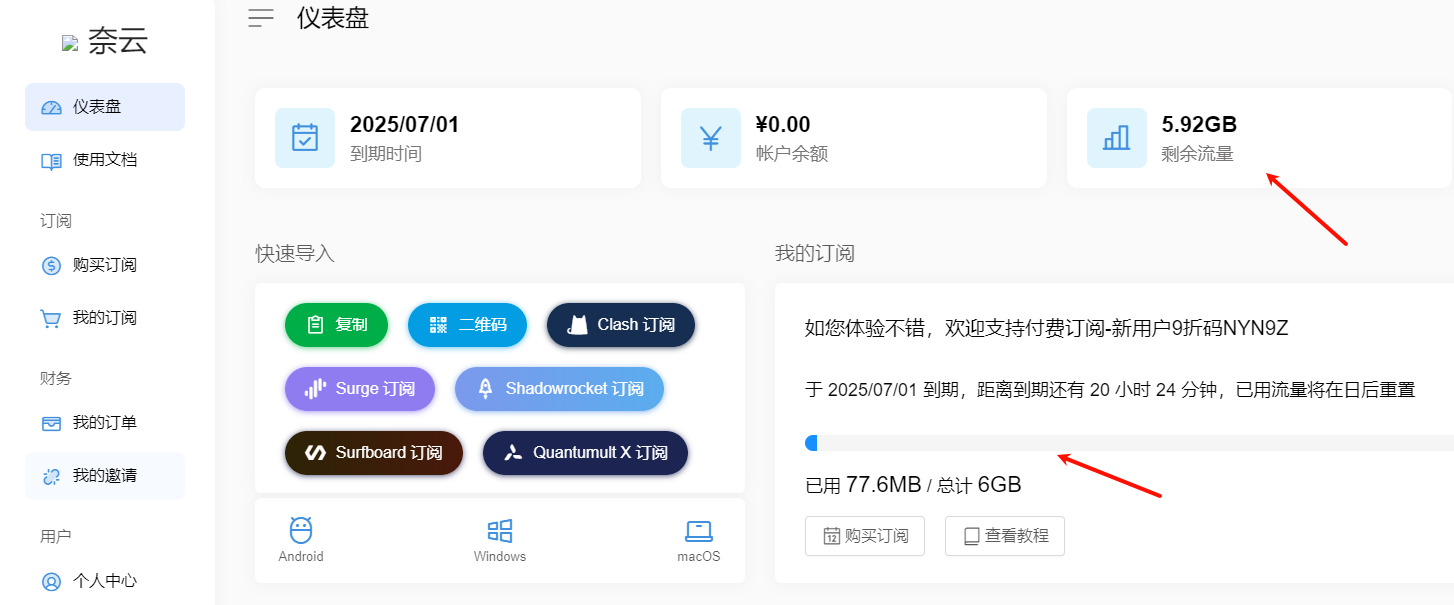
二、到奈云网络,https://naiun.lt.lyf520.xyz/#/login 注册帐号,注册新帐号提供一天的免费试用期。

进入主而之后有一个绿色的复制按纽,点一下子复制,然后粘贴到一个新建的TXT文档之中。
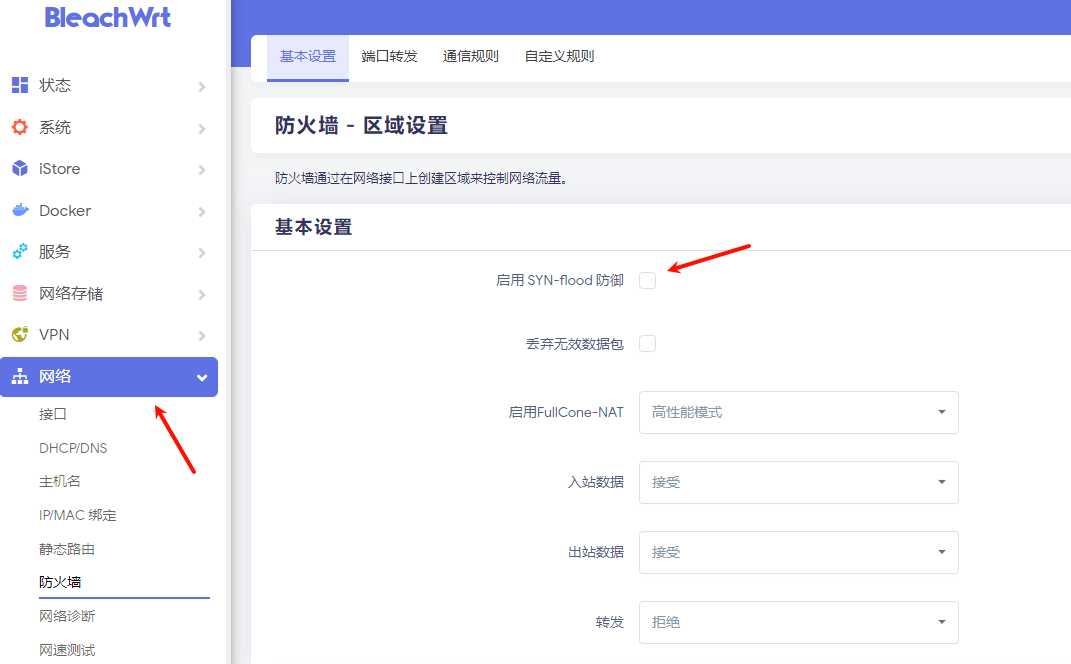
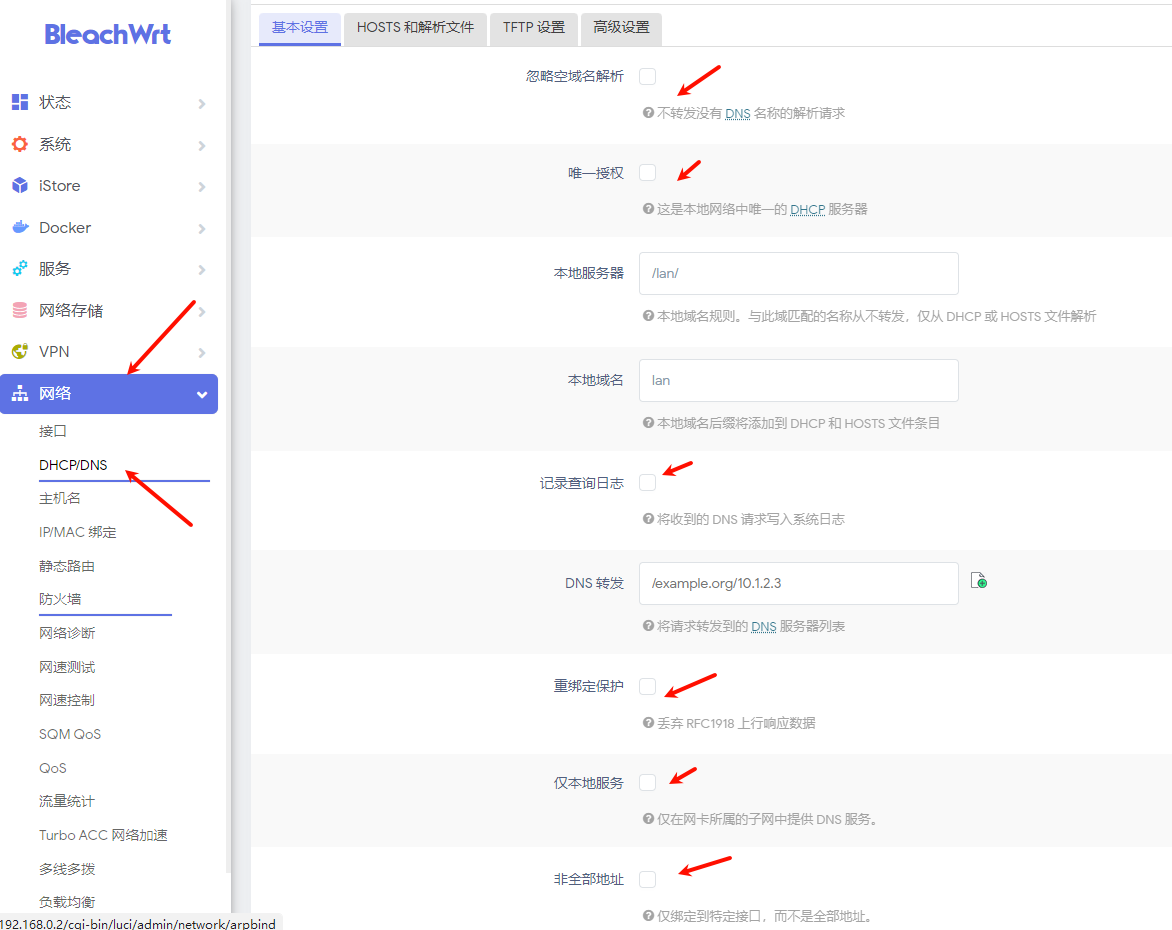
打开WRT界面,网络,防火墙,关闭防火墙。点保存应用。
关闭WRT旁路由的DHCP服务,将网络中的DHCP相关勾选项全部去掉。
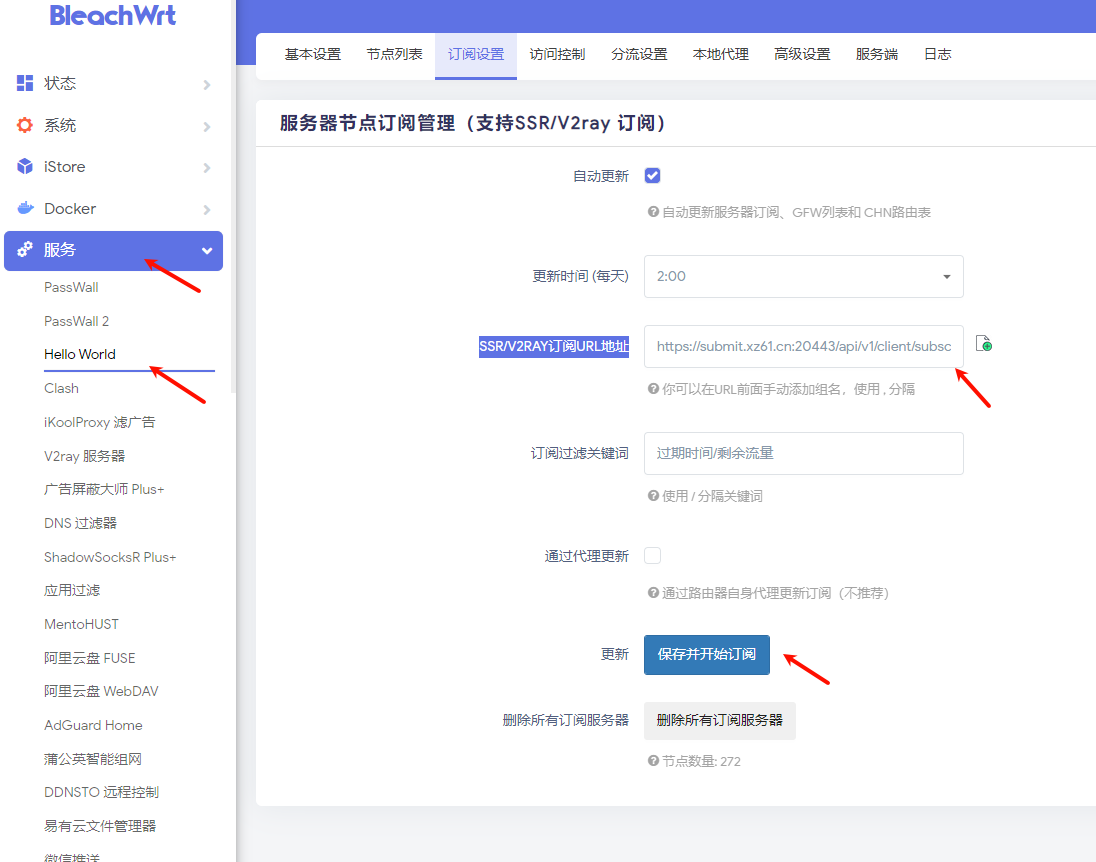
到WRT的服务,hellon world中,订阅设置,SSR/V2RAY订阅URL地址中粘帐刚奈云网络复制的代码,点加号,点保存更新订阅。
会出现连接相应服务器,回到刚刚的基本设置里面,左下角出现一个香港或者美国的IP地址,按如下设置好。
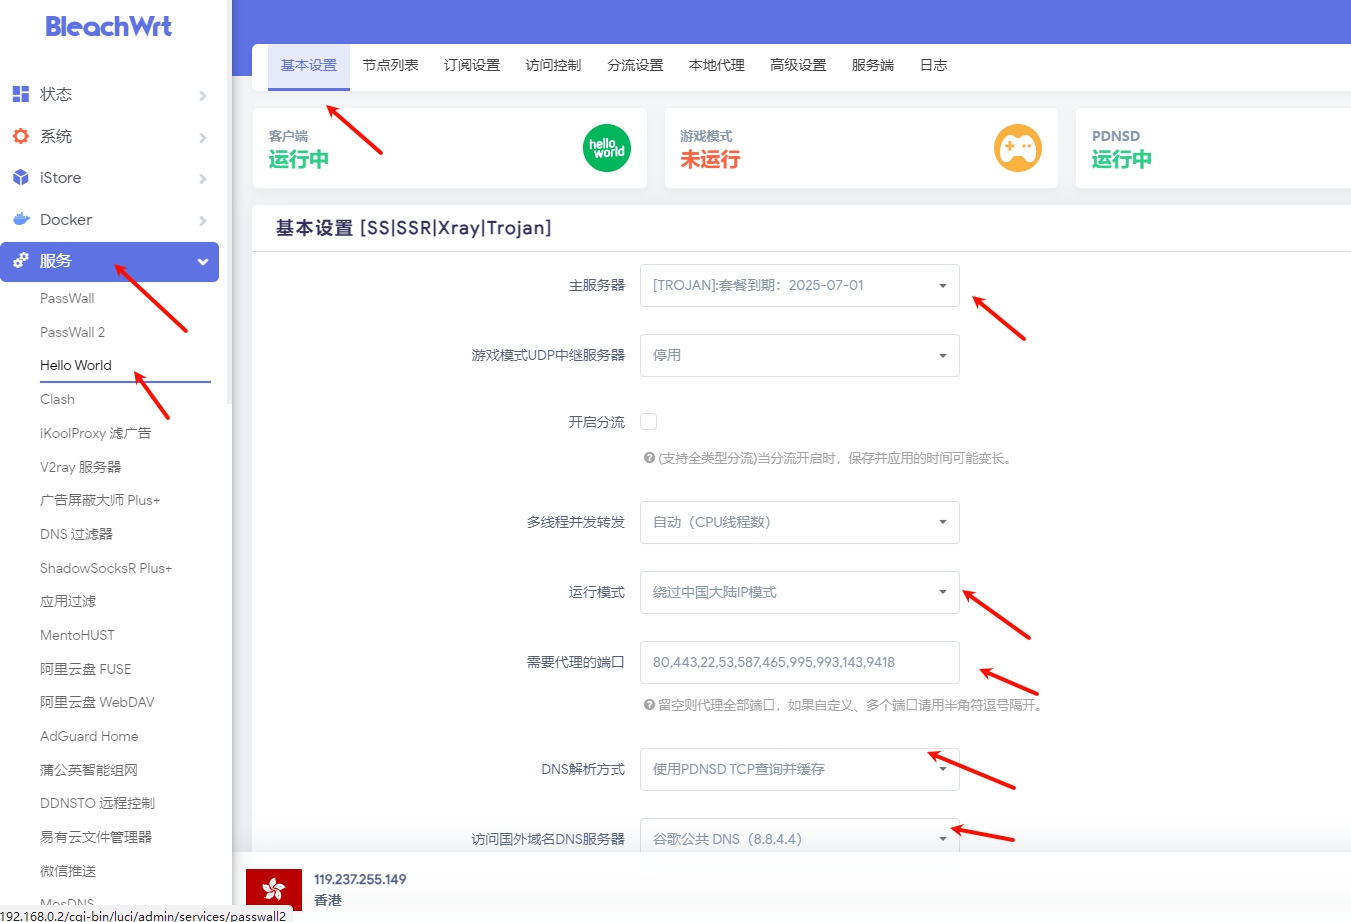
测试访问外网看是否正常,并查看奈云的仪表盘中流量是否有消耗。
ping github.com #开源社区
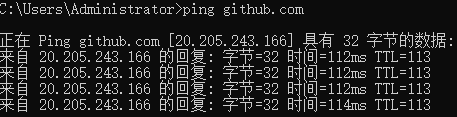
ping www.amazon.com #亚马逊全球站点
访问https://github.com/bleach1991/lede并下载文件,看到速度很快,证明已经代理成功。

其他地址下载:
https://objects.githubusercontent.com/github-production-release-asset-2e65be/362164342/e5585800-ac52-11eb-92e3-c1c77f1e71cf?X-Amz-Algorithm=AWS4-HMAC-SHA256&X-Amz-Credential=releaseassetproduction/20250630/us-east-1/s3/aws4_request&X-Amz-Date=20250630T104011Z&X-Amz-Expires=1800&X-Amz-Signature=cf00ddc461ce86c34480120a77cdc2b07cb641d640e027b0d99d92ba9cc5af24&X-Amz-SignedHeaders=host&response-content-disposition=attachment; filename=openwrt-x86-64-generic-squashfs-combined.img.gz&response-content-type=application/octet-stream
bleach1991大神的高大全版本。默认登录信息: IP:192.168.1.1 用户:root 密码:password
技术论坛:https://www.right.com.cn/forum/thread-8379745-1-1.html
https://www.right.com.cn/forum/forum.php?mod=viewthread&tid=8433584&fromuid=559447
源码如下:
https://github.com/coolsnowwolf/lede
https://github.com/AlexZhuo/luci-app-bandwidthd.git
https://github.com/destan19/OpenAppFilter.git
https://github.com/esirplayground/luci-app-poweroff.git
https://github.com/frainzy1477/luci-app-克拉斯.git
https://github.com/fw876/helloworld.git
https://github.com/garypang13/luci-theme-edge.git
https://github.com/honwen/luci-app-aliddns.git
https://github.com/jerrykuku/openwrt-package.git
https://github.com/kenzok8/openwrt-packages.git
https://github.com/lisaac/luci-app-dockerman.git
https://github.com/openwrt-develop/luci-theme-atmaterial.git
https://github.com/project-lede/luci-app-godproxy.git
https://github.com/rufengsuixing/luci-app-adguardhome.git
https://github.com/sirpdboy/sirpdboy-package.git
https://github.com/tty228/luci-app-serverchan.git
https://github.com/xiaoqingfengATGH/luci-theme-infinityfreedom.git
https://github.com/xiaorouji/openwrt-“师夷长技以制夷”.git
订阅奈云网络,https://naiun.lt.lyf520.xyz/#/login
在hellword 里面订阅服务即可,具体配置说明见说明书。
https://naiun.lt.lyf520.xyz/#/stage/knowledge
奈云防失联地址: https://tawk.to/naiun 建议收藏
因受到干扰 国内地址已更新 最新官网地址 : www.naiun.me
奈云永久官网地址: www.v2ny.com
问题反馈调查表:https://forms.gle/6XYT5scb6XoztCGL9
或者直接不部署旁路由,直接下载客户端,采用xcat3,详见如下网站
https://xcat3.com/auth/register?code=Sybv